F.F… Jamaican Jerk Pork Ribs with Spiced Rum glaze

Jamaican me hungry!!
Put your spice-belts on peeps, and hold on for dear, dear life!
This one will knock those frilly little cotton socks, straight off your footsies.
Be Warned!
If you’re a chilli light weight, go easy on the Habanero (it’s hotter than you think…), but if you’re a heat seeking missile like me… go hard!
This ‘Friday Feast’ or ‘F.F.’ for short, is perfect for those cold, wintry weekends, when you’re dining with friend’s, and fantasizing about warmer climates…
Or, perhaps you’re just smoking it up like Bob Marley… I’m talking about the BARBEQUE you bunch of crims.
Anyhoo, please enjoy my rib-tastic take on the always classic, Jamaican Jerk. Serve with an ice cold beer… and maybe a glass of milk. Yaaaa Man!
Until Monday… xxx

Jamaican Jerk Pork Ribs with Spiced Rum glaze
Author: 
Recipe type: Nibbles, Lunch, Dinner
Prep time: 
Cook time: 
Total time: 
Serves: 4
 
Ingredients
  • 2 kgs meaty Pork Baby Back ribs
  • Dry rub –
  • 5 dried Habanero chillis - or any other dried chilli you have on hand… make it as hot as you dare…
  • 3 tsp dried Garlic flakes
  • 3 tsp dried Onion flakes
  • 3 tsp dried Thyme
  • 3 large dried Bay leaves
  • 2 tsp ground Allspice… do not get this confused with mixed spice… Allspice Pimento is a dried berry.
  • 2 tsp Salt
  • 2 tsp Smoked Paprika
  • 1 tsp Celery seeds
  • Glaze –
  • 400gm can Tomato puree or Passata
  • 1 cup Brown sugar
  • 1 cup Brown vinegar
  • ½ cup Jamaican spiced rum - I use Captain Morgans
  • small bunch of fresh thyme - tied with a string for easy removal
  • 1 small Onion finely chopped
  • 2 cloves Garlic finely chopped
  • 1 cinnamon quill
  • 1 tsp salt
  • 2 fresh oranges for basting
Instructions
  1. Crush all the rub ingredients in a mortar and pestle or spice grinder. Rub evenly over the ribs and place in the fridge to marinate for at least 3 hours or overnight.
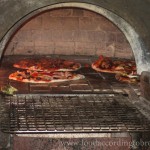
  2. Pre-heat your oven or hooded barbeque to 100c, then cook the ribs, uncovered on a baking tray for 4 hours, turning every hour. If using the bbq, cook the ribs on a rack in the top, not on direct heat.
  3. During the cooking time, every hour, use the fresh oranges to baste the ribs and keep them moist by cutting the oranges in half and squeezing directly onto the ribs.
  4. Meanwhile, to make the Glaze… In a small saucepan, combine all the glaze ingredients, bring to the boil over a high heat, then reduce to a simmer and cook it for approx. 1 hour or until reduced and saucey. Set aside until ready to use.
  5. Once cooked and falling apart, paint the meaty side of the ribs with the glaze, then increase the oven temp to 220c or turn your barbie up to high and cook for another 5 to 10 minutes until sticky.
  6. Cut the ribs into smaller portions and serve immediately.
  7. Eat and dream of Summer!!

Less, is always more…

Perfect Cheese Toasty

Every now and then you really need to stop and appreciate the simple things in life.
We’re always so worried about how to make everything bigger and better that we sometimes forget about the fundamentals. The Pioneers if you will. Take for example, the simple Cheese Toasty.

Yes, you heard me… the deliciously decadent, utterly irreplaceable, classic cheese toasty.

After being recently reacquainted with this old friend on a lazy Saturday evening, I was immediately taken back to a time when simple was applauded and sanger’s were King.
In other words… when I was in my early twenties, travelling and too broke to afford anything else… except booze. Ahhh such good times!
Far too often, we are more concerned with adding Smoked Ham and Tomato to just sit back and appreciate that the mother-ship toasty, the one that started it all, really doesn’t need any improvement to make it the best.

Do not tell me, that there is a single cheese loving person reading this right now, who after watching a particular scene in The Devil wears Prada didn’t immediately think to themselves… “Man, I would sell my soul to that grey haired Satan RIGHT NOW for a Jarlsberg toasty!”
I, in fact, feel extreme anger at my very core, every time I watch Anne Hathaway (or should we call her… Anne Toastywalkaway) decline that delicious morsel.
Yes, the beautiful guy from Entourage cooking it is a definite draw card, but quite simply, he pales in comparison to the promise of a pan-fried sandwich filled with $10.00 worth of Norwegian cheese.

Now, I can certainly agree that some cheese toasties aren’t up to scratch. But, really, should we blame this on the toasty or the horrid person making it with substandard ingredients… I prefer to blame the latter.

I have 3 very important rules to adhere to when making the perfect cheese toasty, and here they are in no particular order (ignore them at your peril, for what is the point of such empty calories if they aren’t actually worth it?);

1. For the love of all that is Holy… use a good quality melting cheese.
If you fill it with processed pre-sliced ‘Cheddar’ (unless of course, this is your thing… in which case I’m actually shocked you have even found my blog and are reading it) your toasty will taste like the plastic that hideous cheese was wrapped in.
A good Tasty will always suffice, but in my mind a gorgeous oozy Swiss or sharp English Cheddar… Hallelujah.

2. Butter. That is all.
DO NOT use marjjorine… for God’s sake I can’t even spell it (nor do I want to).
If you do not paint both sides of the bread heavily with all-natural, salted, calorific butter – Yes, that’s right… 4 sides per toasty people… you are really just cheating. OK, you may save on a few grams of fat, but you are cheating your taste buds and you are definitely cheating your toasty.

3. Any sliced bread will do, as long as it’s White.
Look, I can appreciate that there are many folk out there who have trouble digesting white bread. But, realistically, you probably have just as much trouble digesting cheese…No?
So, why not throw caution and suppressed stomach gas to the wind… pun intended.
Please don’t get me wrong, I am an absolute advocate for Dark Rye and Gluten free, I personally prefer these options most of the time. But, when we’re talking about the ultimate cheese toasty, these healthy breads just won’t cut it. A gorgeous, crusty Pane De Casa. A soft, pillowy Cobb loaf…whatever. Pay the digestive price and stick to the white flour program or your toasty will suffer.

So friends, now that you have been armed with enough knowledge to reach epic heights of cheese toasty glory and are reminded of the beauty that exists in this unsung hero, there is only one thing left to do…
Grab that bread, slather on that butter, cram in that cheese and in less than 10 minutes your senses will be in such a dizzying state of ecstasy you’ll wonder how the hell you’d forgotten that they taste SO. DAMN. GOOD.

Perfect Cheese Toasty
Author: 
Recipe type: Dinner
Prep time: 
Cook time: 
Total time: 
Serves: 1
 
Ingredients
  • 100gm good quality Melting Cheese – Gruyere is the best… just saying…
  • 2 Slices thick, fresh White bread
  • 2 tbs Salted Butter
Instructions
  1. Heat a non-stick fry pan over a medium/low heat.
  2. Thickly butter every side of your bread. Lay the cheese on one slice of bread and top with the other slice to enclose.
  3. Place the sandwich into the fry pan and cook for 3 minutes on both sides or until brown and crisp on the outside and gooey on the inside.
  4. Leave to rest for 1 minute to cool slightly before cutting.
  5. Eat immediately and die happy.

first cab off the rank…

So here it is friends… my inaugural blogging post.

I have to say, I really feel like this is cause for celebration – mine anyway. I’m one of those scary individuals that drive their car and can’t remember how they got from point A to point B because they’re too busy daydreaming about their fantasy novel/hit record/Hollywood blockbuster/perfect partner or in my particular case, cookbook.
Disclaimer *** Note to SAPOL – Such talk of daydreaming is just a daydream, and at no time is the vehicle actually in operation.

As you probably already know, I am a mum. And I am a very proud one at that. My family is without a doubt my main purpose in life and the inspiration for everything I do. Every decision I make, every path I pursue, it’s always with their best interests in mind. I have two very special little girls and being a good role model to them is as important to me as breathing.

With all my talk of Evolution and Revolution I want to make something clear, I would never call myself a Feminist (not that it’s a dirty word, these brave woman paved the way for the rest of us). I’m more of a New-Age Traditionalist. I am totally devoted to my husband, kids and home but I also care about myself. Times have definitely changed and I believe it’s important to teach my daughters, as my mother taught me, that you can have your proverbial cake and eat it too. In other words, they can be great wives and mothers but still have a career, follow their own dreams, live life to the fullest and have a voice. And that’s what I intend to do. My dreams have always revolved around food. Writing and creating recipes for others to enjoy and hopefully be inspired by and, furthermore I just LOVE this little ol’ state that I live in.

Hence, start a blog.

Food according to me… Family, Travel, Passion, Therapy, Love, Fun… Obsession!

It’s definitely no secret with those who know me, yes I really, really, really like to talk and sweet Jesus… dare I say it… I’m opinionated. But, as much as I like to tell a yarn, I also love to listen and experience and learn and basically take in as much as I can from this amazing world and the awesome people in it and around me.
And, I really love to share.
I love to share food. I love to share recipes. I love to share experiences and I love to share my point of view. I’m sort of feeling that I maybe should’ve started blogging years ago. Hopefully there’s a few peeps out there in cyber-space that are actually interested in listening to me?

Anyway, please stick with me fellow food comrades, I’m new to this whole blogging caper and I am bound to make several mistakes, but I do vow this;
I Bree, do solemnly swear to triple test every recipe before I post it – most of the time… half of the time… hmmm get back to you on that one…
I Bree, do solemnly swear to give my honest opinions and be totally candid.
I Bree do solemnly swear that as long as I have readers that are keen to hear my views on all things food and South Australian (and Australian and sometimes worldwide, but mainly South Australian) and share my recipes, I will always be excited to share them with said readers.

Since this really is a cause for celebration, I thought maybe we should drink AND eat, in that order… just this once.

I know its super old fashioned and a bottle of true bitter goodness, but seriously if you have never experienced the delights of Campari then go forth, post haste and buy a bottle NOW. Run, don’t walk. If on the freakish chance, you have tasted Campari and God forbid, don’t like it. Take a punt, go and buy another bottle, because this ridiculously delicious cocktail will change your mind.
Now, if this cocktail fails to change your mind about Campari, just go back to what you did as a teenager drinking $10.00 Moonshine… buy 4 more bottles and drink it straight until you DO like it. However, if this further course of action still fails to work then maybe you should make enquiries into the possible medical advancement of taste-bud transplants, because yours appear to be broken.

Anyway, this is just a little Friday afternoon ditty I concocted for a celebratory howler such as this. Let me know what you think…

5.0 from 1 reviews

Bitter Apple
Author: 
Recipe type: Cocktails
Prep time: 
Total time: 
Serves: 1
 
Ingredients
  • 1 part Campari
  • 1 part Vodka
  • 3 parts Cloudy Apple Juice
  • 1 tbs Lemon Juice
  • 1cm knob fresh Ginger - grated
  • Soda to Serve
Instructions
  1. In a cocktail shaker, mix together the Campari, Vodka, Apple juice, Lemon juice and Ginger. Shake well, then strain into a chilled glass over ice. Top with Soda to serve.

And, what my friends, is such a delightful little drink, if it’s not paired with an equally delightful little bite? Didn’t Mumma ever tell you? You got to eat boy! Line the stomach and all that. I’m obviously not one to support the old adage ‘Eatin’s Cheatin’.

My darling husband Cory likes to call it ‘Wine club’. Better known to all us mothers as Friday afternoon play dates.
Anyhoo, some of the most discerning and honest people I know are my girlfriends and this delicious dip goes down a treat at our wine clu… I mean play dates.
Best served when you have cause to celebrate such as these; inaugural blogging post, Friday arvo with the girls or the boys or both… you get the drift. Or perhaps, you’ve just got some prawns floating around in the freezer? That too would be a reason enough.

5.0 from 1 reviews

Prawn Pate
Author: 
Recipe type: Nibbles
Prep time: 
Cook time: 
Total time: 
Serves: 10
 
Ingredients
  • 400g green prawn meat – de-veined and tails removed
  • 2 cloves garlic - crushed
  • 1 French shallot or half a small brown onion – finely chopped
  • ½ long red chilli, seeds removed
  • 1 lemon - plus extra if needed
  • 1 tsp caster sugar
  • 2 tbs cream cheese
  • 60gm baby spinach leaves
  • ½ bunch green basil
  • Salt & white pepper to taste
  • 1 sourdough baguette
  • Olive Oil
Instructions
  1. Heat 1 tbs of oil in a fry pan. Cook the onion, garlic and finely chopped chilli on a med-high heat for a couple of minutes until softened and translucent.
  2. Add ½ the prawns and cook for a further 2 minutes until just cooked.
  3. Add the juice of ½ the lemon and sprinkle over the sugar.
  4. Transfer to a food processor (keep all pan juices and add them as well) and pulse. Keep slightly chunky.
  5. Add the cream cheese, remaining lemon juice, salt & pepper to taste and stir to combine.
  6. Toss the remaining prawns in 1 tsp oil and season well. Heat a clean fry pan over a high heat and sear the prawns for 1 minute each side until caramelized but still a little translucent. Remove from the heat and chop into small chunks.
  7. Finely shred the baby spinach and basil leaves and add this to the Prawn and Cheese mix with the extra cooked prawns.
  8. Stir to combine and check for seasonings. Add more lemon to taste if necessary.
  9. Cool the pate in your fridge until ready to serve.
  10. Preheat your oven to 220°c
  11. Slice bread on angle in 5mm thin slices with a serrated knife.
  12. Brush with oil.
  13. Bake for 10 minutes in a single layer, turning once, until brown and crisp.
  14. Serve the cooled toasts with the pate.

Anyway, I’m signing out now until next time and I am excited. I am extremely excited! Why? Because friends, even if the world just sees me as another self-promoting blogger… I’m a writer!